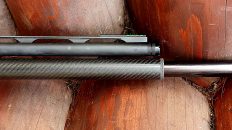
This bolt on rib from Toni System in Italy has some obvious features that may appeal to many but the less obvious potential benefits were behind my decision to get one for testing. After using it on my M2 for a few months I wanted to share my findings.
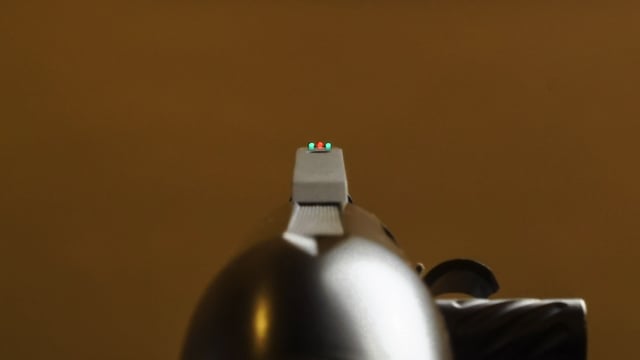
 The most obvious features are the bright front sight and mid-rib rear sight which combine to give a good sight picture for precise shot placement, maybe most often encountered with the challenging shots we face on slug and buckshot stages. The design of the rear sight also allows a wide range of adjustment for elevation on a ramp and some fine tuning of windage by carefully adjusting the mounting screws.
I had added a rear sight to the middle of my rib long before I started to use the Toni Rib so I will say that this aspect of the setup wasn’t entirely new to me. When I am shooting fast I don’t find the rear sight causes any distraction, in fact I don’t even see it in situations where rapid splits and transitions are occurring but it is there for occasions where aimed shots are needed. Another interesting situation where I have found a mid-rib mounted rear sight enormously beneficial is for weak shoulder shooting, the mount on the offside may not be as instinctive and the possibility of checking alignment as you shoot via a second sight can be a very valuable option in this situation.
The less obvious benefits which I suspected might come from moving to a higher sight plane have also proved to be tangible and in many ways these geometric alterations seem to address the fact that shotguns are in general intended to shoot targets in the sky where practical shotgun stages are commonly dominated by ground based targets. The higher sight position has meant fitting a raised cheek pad to my stock and these two changes have combined to make my head sit closer to the vertical when the gun is mounted, I have discovered that I like this, in fact I like this a lot!
The different parts of our eye are designed to perform different functions which pre-date practical shooting in our evolution, yes even further back than the Remington 1100 and Prodec belt period! The peripheral areas are better suited to detecting motion (originally to help detect approaching predators that might have eaten our ancestors) and the central area is better for detail and contrast (maybe targets that are hard to identify against similarly coloured stage backgrounds). In addition as we get closer to the central plane in vertical terms the peripheral field of view becomes wider, as shown in the diagram below.
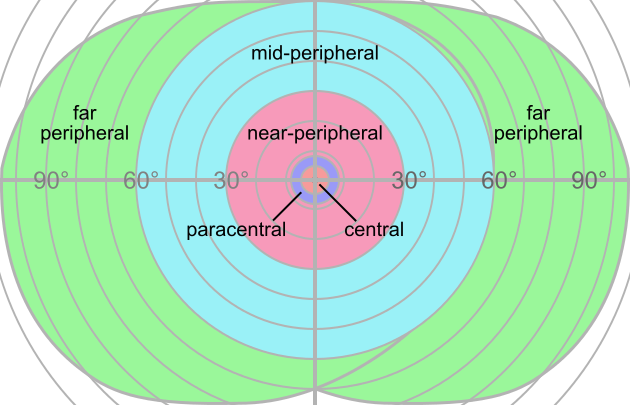
With this in mind it seems logical that there could be several advantages to having one’s head up and eyes pointing as close as possible to straight ahead while we are looking across our sights. Tests made by shooting with the rib over a few months have confirmed this for me. Most noticeably I have a better feeling of spatial awareness when I shoot on the move and I can definitely report these results are very encouraging, even at this early stage in the season. You need to shoot with both eyes open to maximise this effect but I guess that shooting on the move and shooting with both eyes open are linked far more profoundly than the implications of head alignment because bifocal vision plays a huge role in our ability to judge distances.
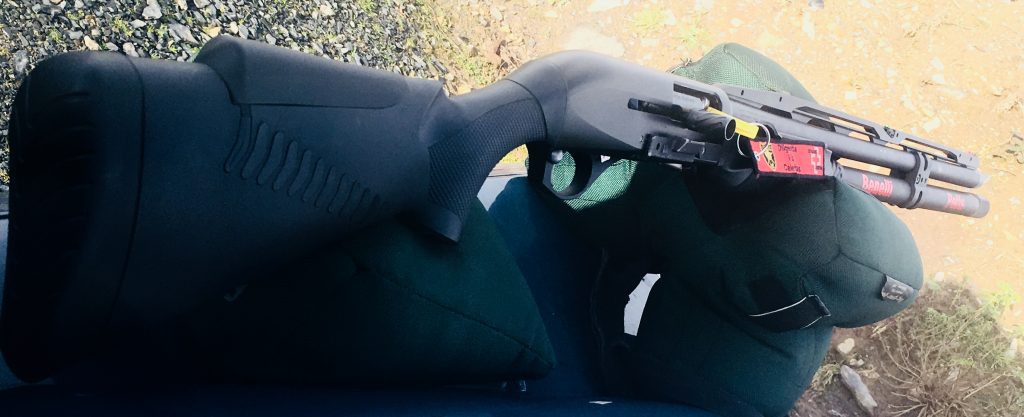
You will almost certainly not put this rib on your gun, love it immediately and shoot faster right from that moment because nothing in life is that simple! You might also have to experiment with stock setup, as I did, before you get used to the totally new view that appears over the gun you used to know so well. That said I am very glad I stuck with the process, I saw real benefits from the altered geometry after about 1000 rounds and some dry fire training – the rib is definitely a permanent addition to my gun. Ultimately you need to try this for yourself to discover if it works for you, remembering that you have to try it for long enough to get used to the change in sight picture and gun mount.
When I ordered from Toni System they listed ribs for a variety of guns including Benelli M2 in 24″ and 26″ but not a 28″ like mine so I sent a drawing for the rib. I see that the M2 28″ has since been added to the list but its worth noting that a custom rib service is available and I should say that the fit of the bespoke rib made from my drawing is excellent despite it being a one off at that time.
| BNM254 |
Benelli M1/M2 barrel 54cm, with rib version
|
€ 240,00
|
| BNM261 | Benelli M1/M2 barrel 61cm, with rib version | € 240,00 |
| BNM265 | Benelli M1/M2 barrel 65cm, with rib version | € 240,00 |
|
BNM270
|
Benelli M1/M2 barrel 70cm, with rib version |
€ 240,00
|
|
BNM247
|
Benelli M1/M2 barrel 47cm, without rib version |
€ 240,00
|
|
BNM250
|
Benelli M1/M2 barrel 50cm, without rib version |
€ 240,00
|
| BNNV61 | Benelli Nova barrel 61cm |
€ 240,00
|
| BNNV65 | Benelli Nova barrel 65cm |
€ 240,00
|
| BE1361 | Beretta 1301 barrel 61cm |
€ 240,00
|
| FRAF61 | Franchi Affinity barrel 61cm |
€ 240,00
|
| FRAF66 | Franchi Affinity barrel 66cm |
€ 240,00
|
| IRO66 | Iron Competition barrel 66cm |
€ 240,00
|
|
BMR61
|
Benelli Montelfeltro-Raffaello, barrel 61cm |
€ 240,00
|
|
BMR65
|
Benelli Montelfeltro-Raffaello, barrel 65cm |
€ 240,00
|
|
BMR70
|
Benelli Montelfeltro-Raffaello, barrel 70cm |
€ 240,00
|
|
BMR75
|
Benelli Montelfeltro-Raffaello, barrel75/76cm |
€ 240,00
|
| Rib made on measure | € 240,00 | |
To fit the rail you will need to drill and tap your rib (not difficult if you’re that way inclined) and this requires a set of M3 x 0.5 taps, which includes taper and bottoming taps, to accomplish the task. I used a drill bit that was a neat fit in the rib holes to mark the centres with a few twists in a hand drill and then reduced bit size to make the clearance holes for tapping. Care is required when working down through the rib, particularly at the front where there is a very small gap between the rib and the barrel on some shotguns, I inserted a thin steel shim to avoid marking the barrel during this work. The supplied mounting screws will need to be trimmed to length for your gun and then have some thread lock applied to prevent them from loosening, Loctite 243 seems to be enough to accomplish this without going overboard on permanence. I also changed the flat grub screws that retain the mid-rib sight for some cone point grub screws, after I adjusted the elevation setting, and drilled some tiny recesses to accommodate the points. This means that in the event the adjustable sight element comes loose it can be detected before it falls off.

